This post delves into hardware hacking and demonstrates how to obtain a root shell on a Philips Hue Bridge and get the hash of the root password.
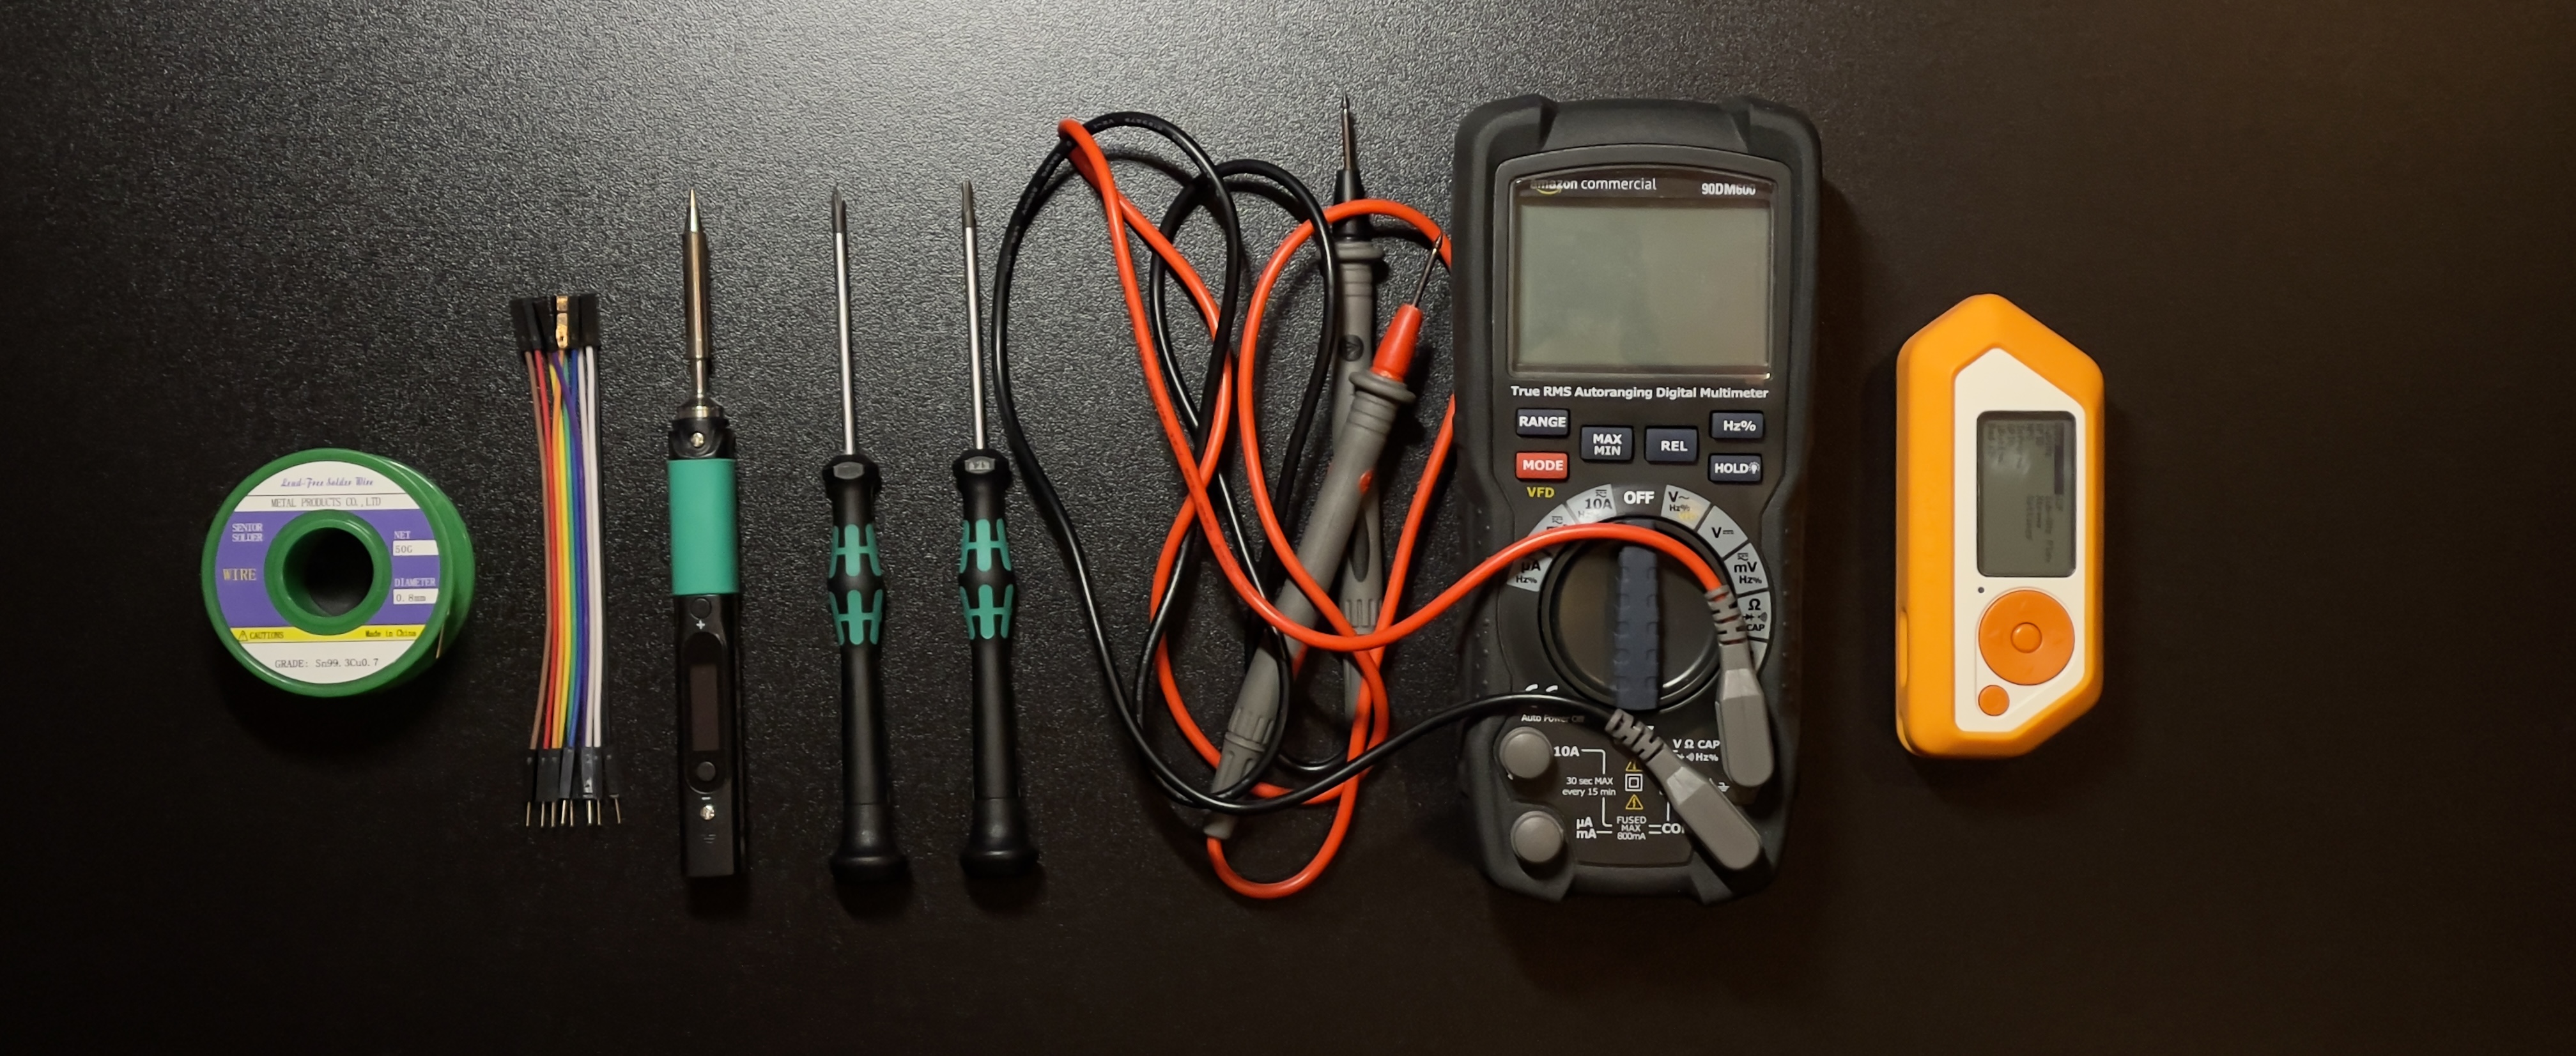
To hack a Hue Bridge, you’ll need several tools:
- Philips Hue Bridge
- Torx screwdriver
- Multimeter
- Jumper cables
- Soldering iron
- USB to UART Interface
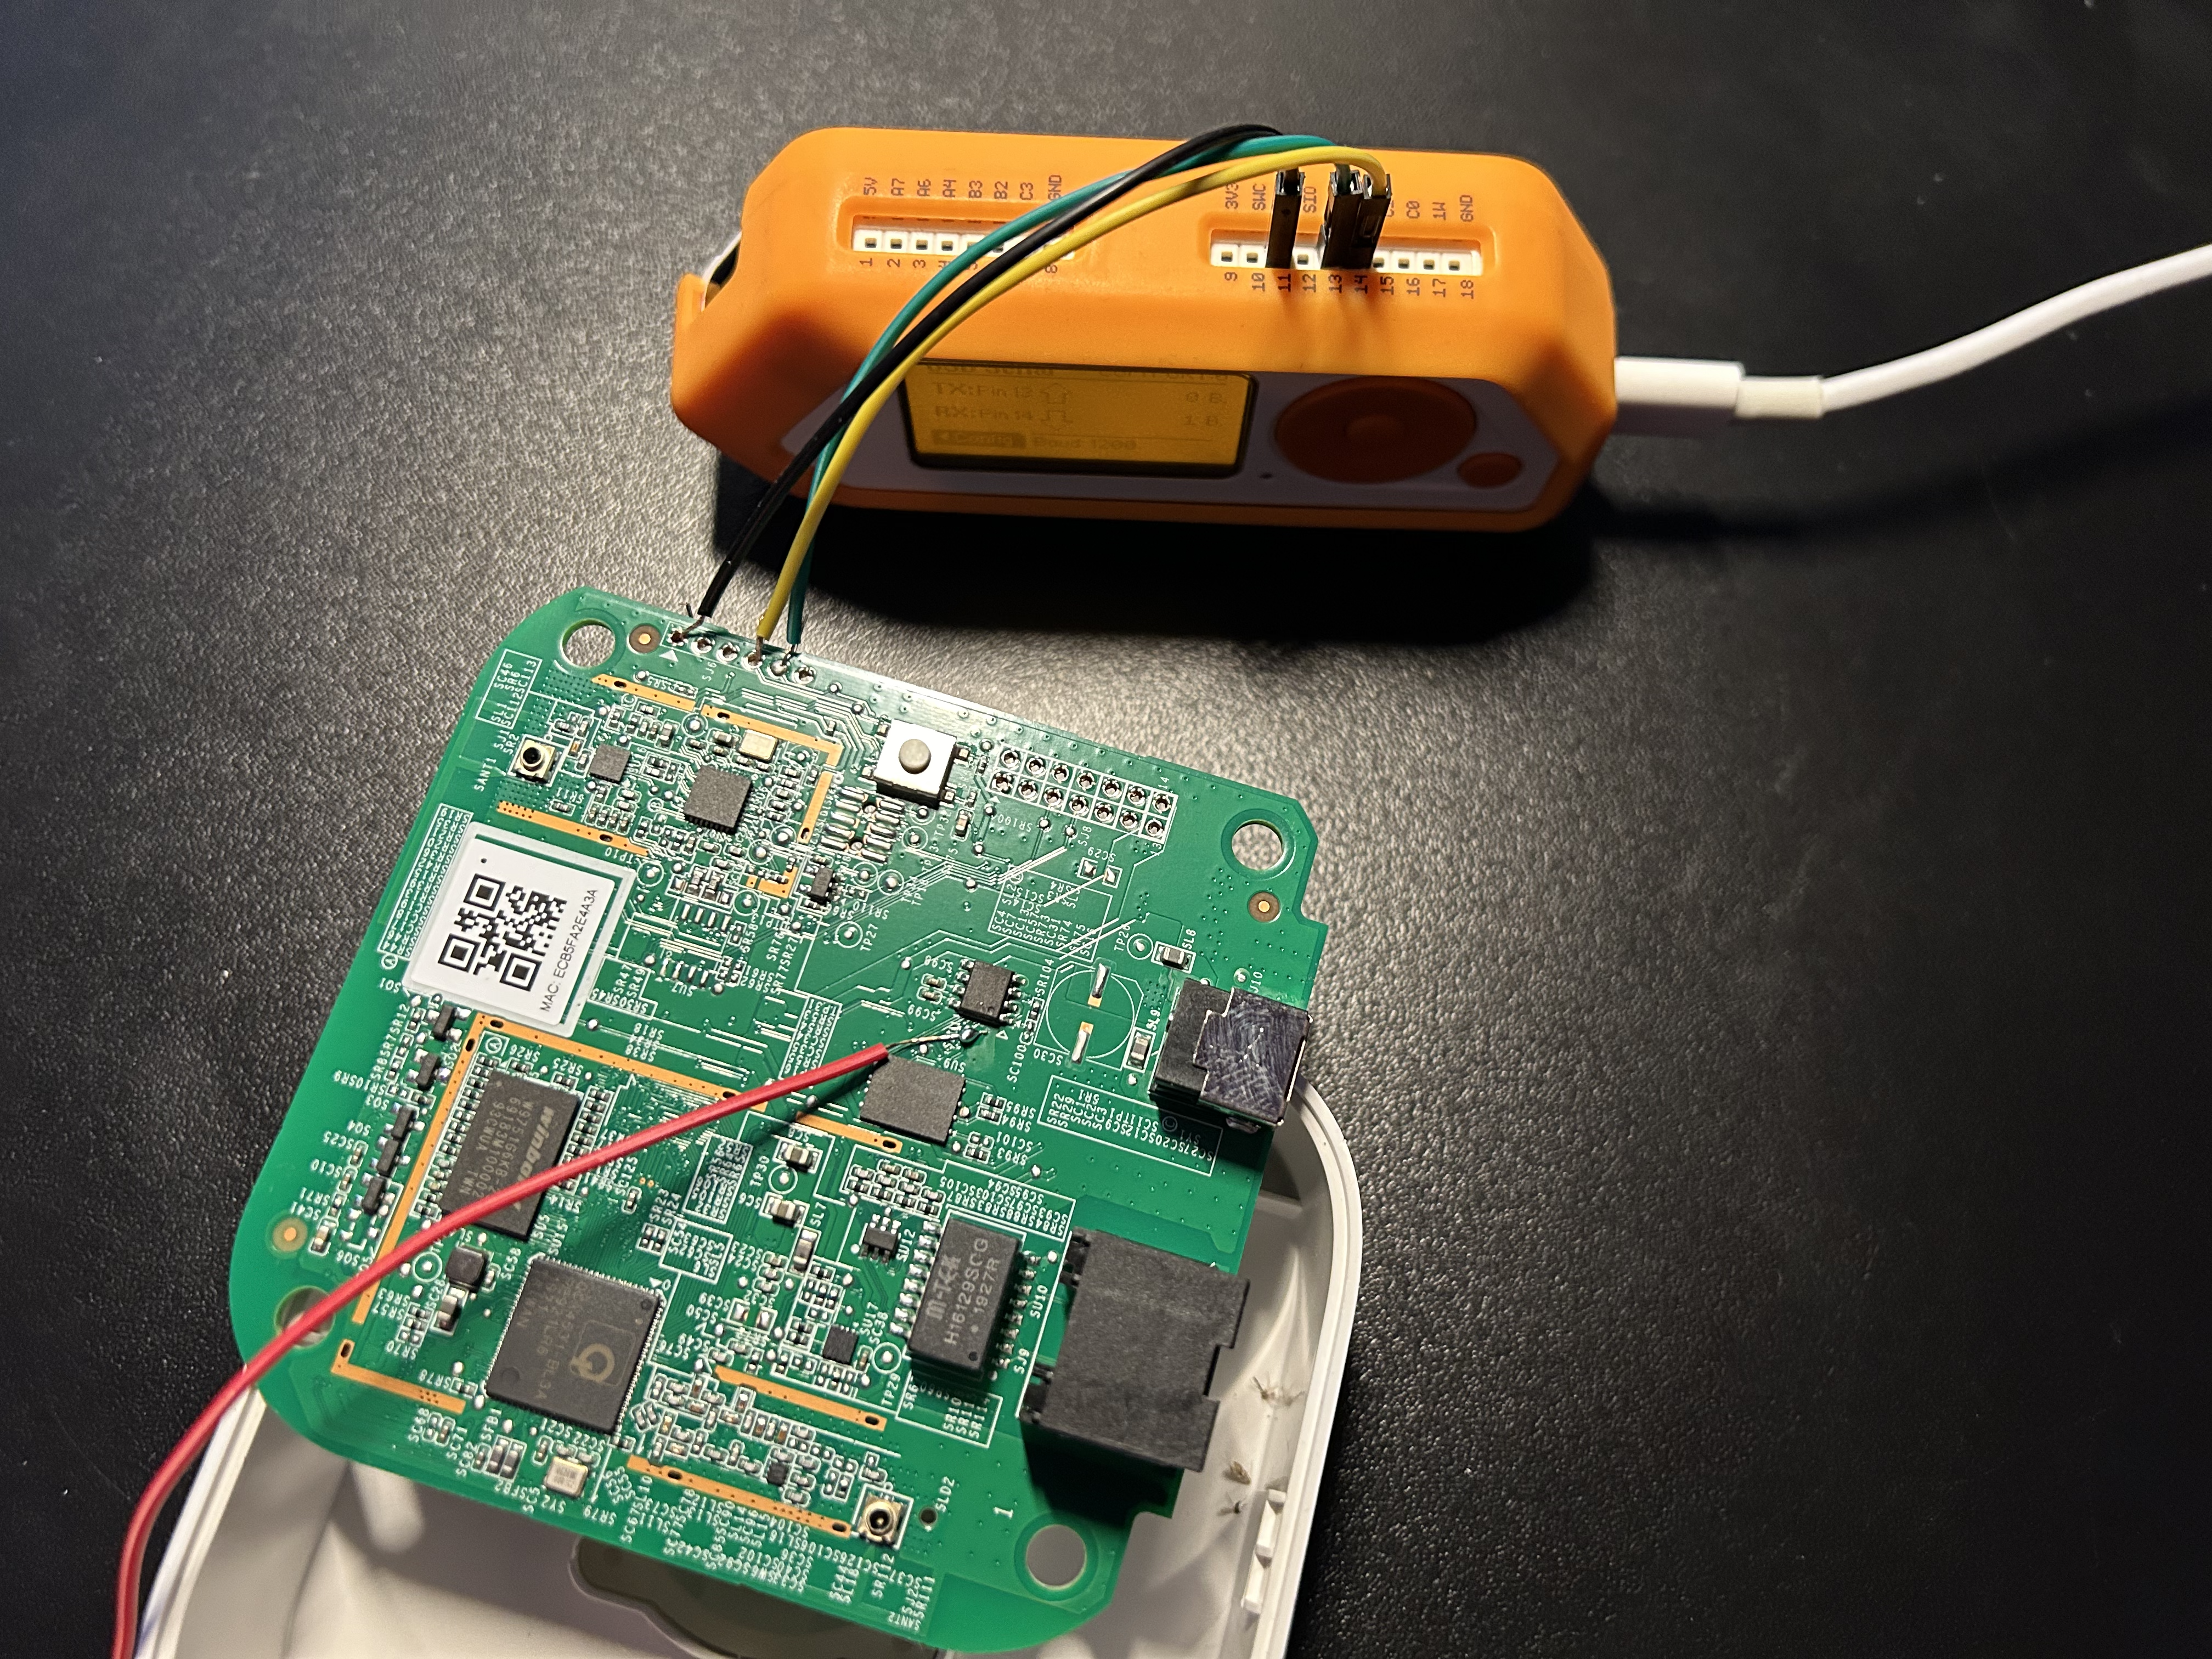
Firstly, open up the Hue Bridge and remove the circuit board.
Next, search for the UART pins. On the Hue Bridge, potential candidates are relatively easy to find. They typically consist of a 6-pin header on the side of the circuit board, with Pin 1 marked by an arrow.
The easiest way to determine the function of each pin is to use a multimeter. Begin by identifying the GND pin when the device is not powered on. Set your multimeter to continuity testing mode and test each pin for connectivity to ground, such as at the DC input. If it beeps, you’ve found a GND pin.
The next step is to power on the device and locate the TX pinout. Set your multimeter to voltage mode and measure each pin while the device is powered on. Note down the pins with a constant 3.3V. Then, measure each of these pins again while powering on the device. The TX pinout should fluctuate in voltage during the booting process as it sends debugging information.
Finding RX is more challenging, as it does not send data, resulting in either very low or zero voltage.
For the Hue Bridge, the UART pinout is as follows:
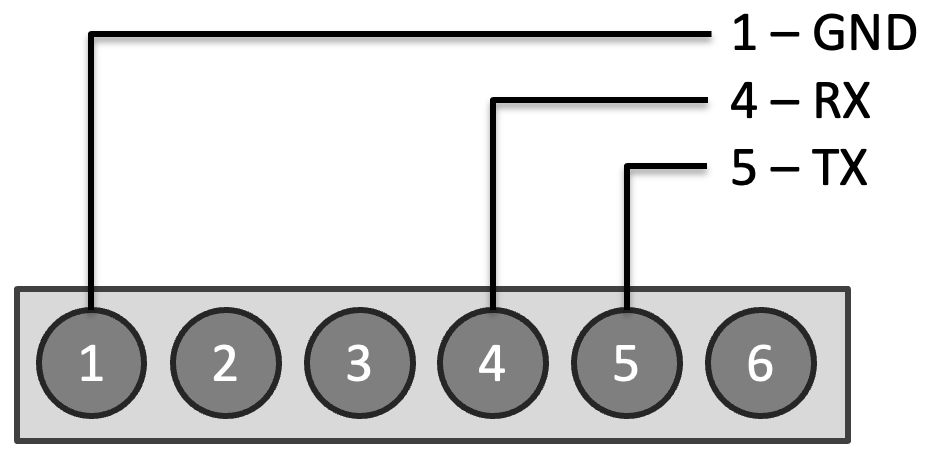
Pin 1 = GND
Pin 4 = RX
Pin 5 = TX
With this knowledge, connect the pins to a UART to USB converter. In my case, a Flipper Zero is used. Remember to switch RX and TX when connecting to your UART device. RX on the Hue Bridge should be connected to TX on your UART device, and vice versa.
To access a command line on your computer, you can use the screen tool on Linux, which is preinstalled on most distributions.
screen /dev/<usb-port> <baudrate>
For most devices, the baudrate is 115200, which is also true for the Hue Bridge.
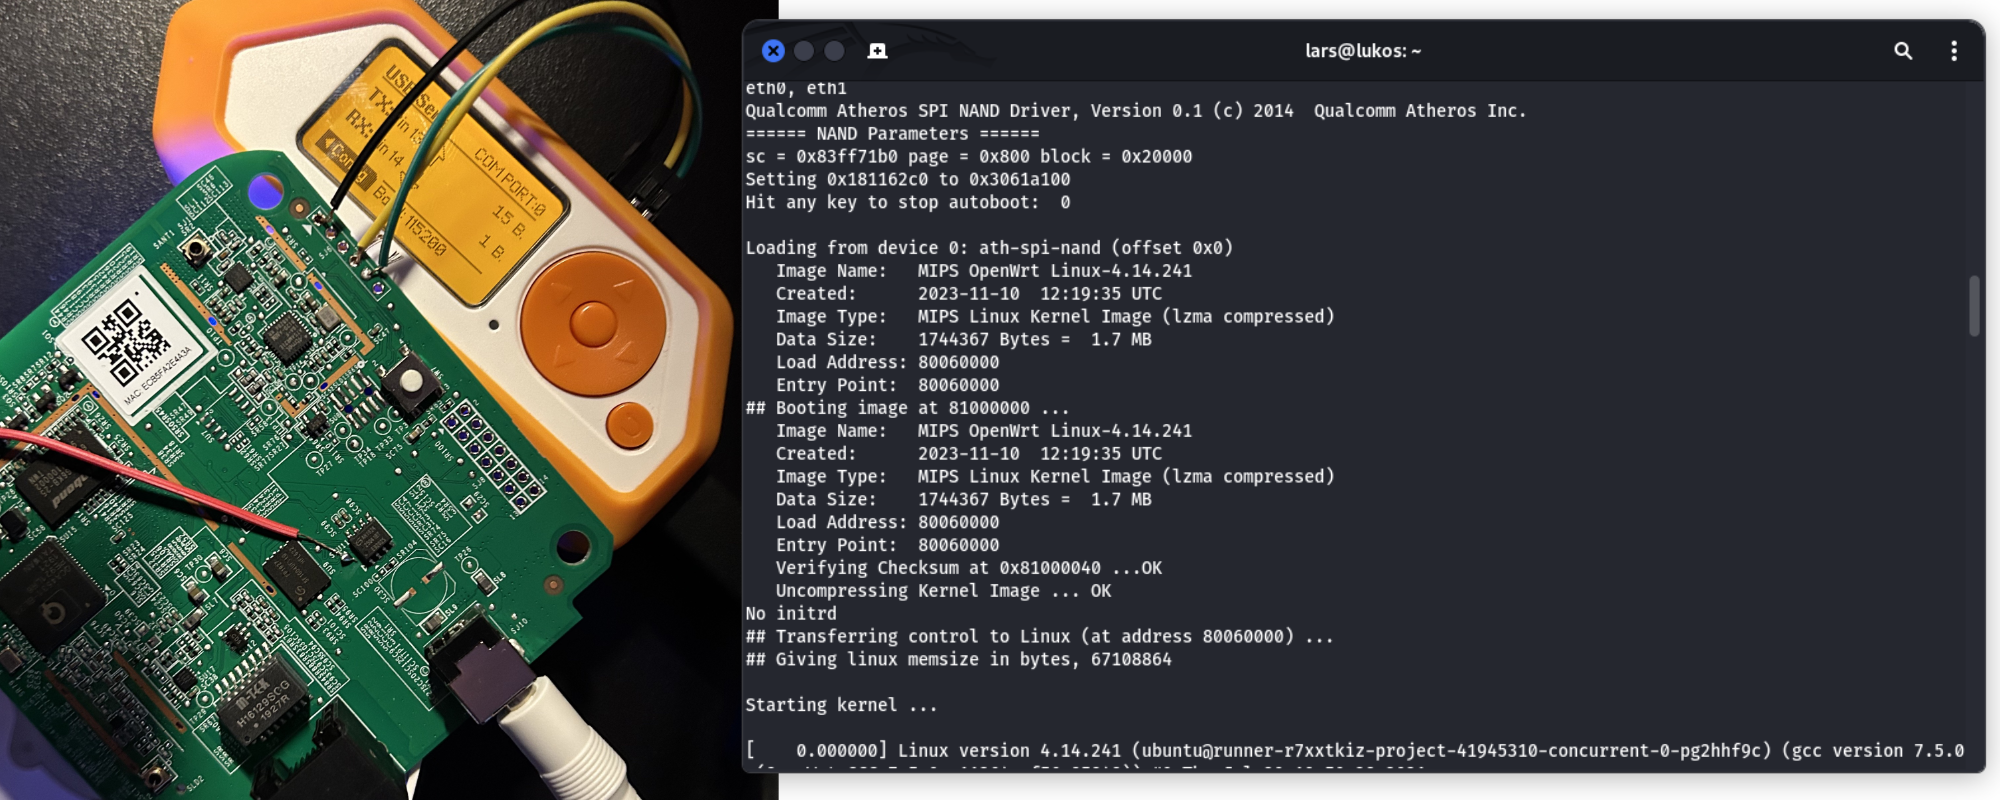
Next, locate a jumper point labeled SEU11. Short this jumper to ground while booting. The easiest GND point is the metal cover of the DC input. You can solder a cable to the jumper or use a paperclip. Shorting the jumper interrupts the boot process and provides a U-Boot command line.

You can now boot up the bridge and observe a plethora of debugging information streaming over your terminal. For instance, it reveals the operating system, which is a MIPS OpenWRT Linux. After a brief wait, you can begin entering commands into the terminal.
To print the environment variables, use the following command:
ath> printenv
You can set a boot delay now for easier access to the menu:
ath> setenv bootdelay 3
This way you do not need to short the jumper anymore while booting.
Printing the boot delay should yield the following result:
ath> printenv bootdelay
bootdelay=3
Save your new settings:
ath> saveenv
Another interesting environment variable is the one that stores the root password:
ath> printenv security
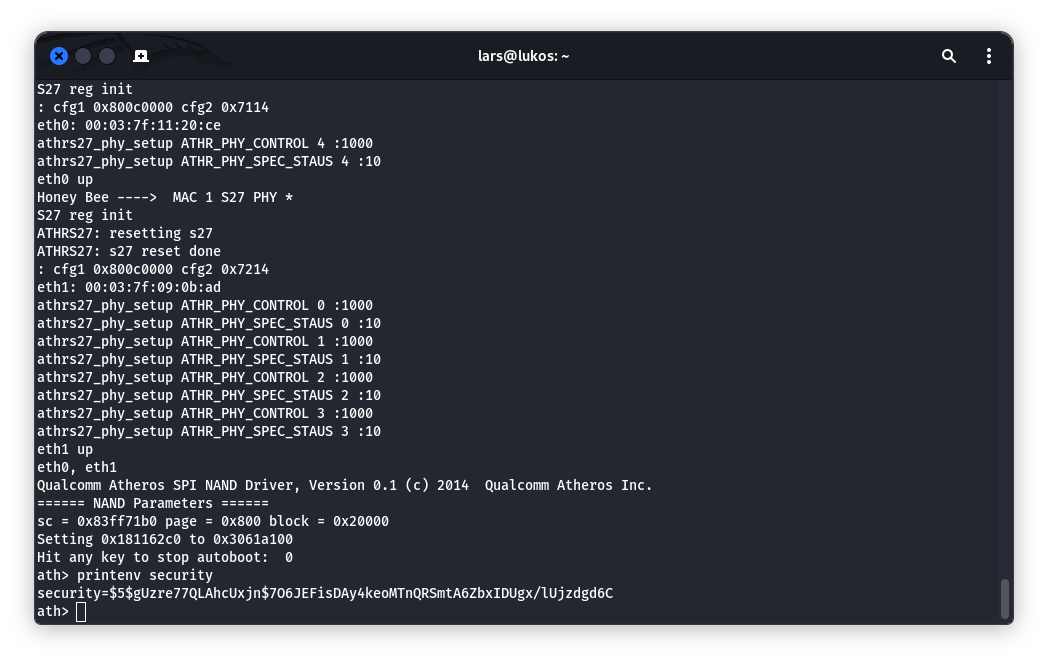
It is not stored in plaintext but in a UnixCrypt hash. You can attempt to crack this hash using a tool like hashcat. However, brute force didn’t work for me, and I aborted the cracking process after 9 characters.
In the past, you could set a new root password using the following command, which sets the password to toor:
ath> setenv security '$5$wbgtEC1iF$ugIfQUoE7SNg4mplDI/7xdfLC7jXoMAkupeMsm10hY9'
Unfortunately, this method no longer works, as Philips has implemented an integrity check for the root password in newer software versions. Thus, to obtain a root shell, you must crack the default password.
Nevertheless, this process remains an interesting journey to learn the basics of hardware hacking.