ZAP is a free and open source alternative to Burpsuite. However, ZAP does not need to be configured as a proxy because requests can be sent directly from ZAP.
In this post I run over the most important features and how to use them.
Scanning directories
ZAP can scan directories, just like dirbuster can.
Right click on the targeted page and select “Forced Browse Page” under Attack:
Then select the desired list and start the scan with the play icon:
Fuzzing
Fuzzing means trying out a lot of payloads randomly. Similar to Active Scan, but much more aggressive. Particularly suitable for XSS attacks. SQLmap is better suited for SQLi.
First create a new fuzzer: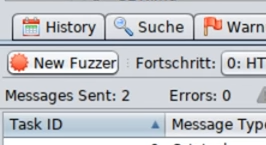
Then select the page to be fuzzed and add fuzz locations. To do this, select the location and click Add: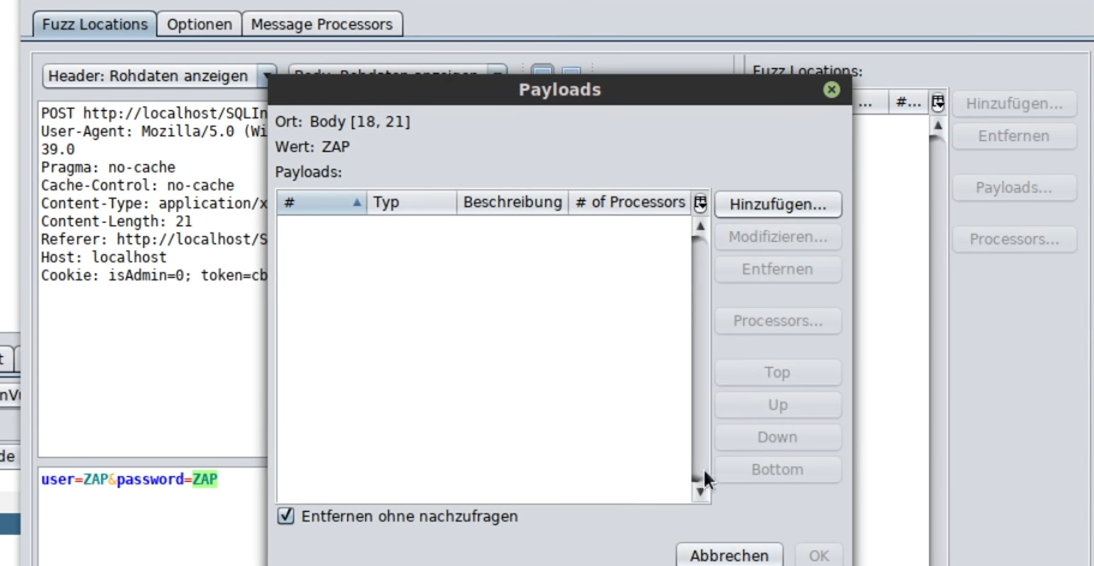
A window with a text field will open. You can add a payload list (SQL or XSS) to this text field using the Add button.
In the options you can set, for example, that only one request per second is made. Some website operators require this to protect their servers: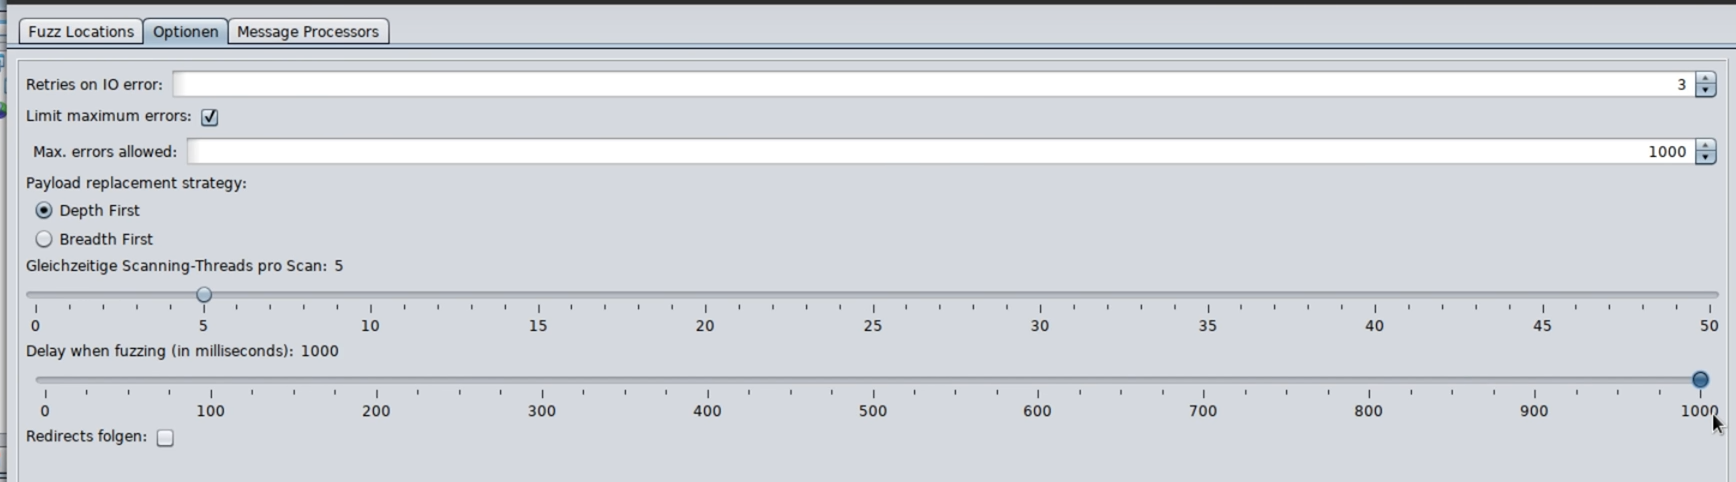
Man in the middle
Works similar to Burp as an interception proxy.
To do this, start the browser via ZAP:

If you right click on an entry in the history and select “Break…” you can interrupt the requests like in Burp, manipulate them and then send them. For example, you can also edit the string and put an asterisk (*) at the end instead of an index.php to use wildcards and expand the scope that way. Afterwards you can switch back to the browser and navigate the page.
Using the control icons you can forward or stop the traffic:

Marketplace
Useful extensions can be installed via the marketplace.
Ideally, you should not use beta or alpha versions: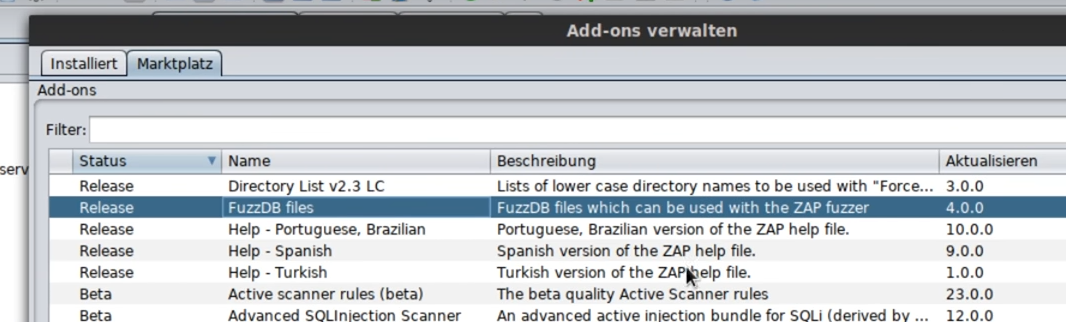
Scripting
Very powerful to be able to use scripts in for example Python while executing certain actions.
Many ready to use scripts can be found here: https://github.com/zaproxy/community-scripts
Context
For attacks that only work when you are logged into a website.
First, the target must be “spidered” so that POST parameters can be obtained and users can be created:
First create a new context for the target: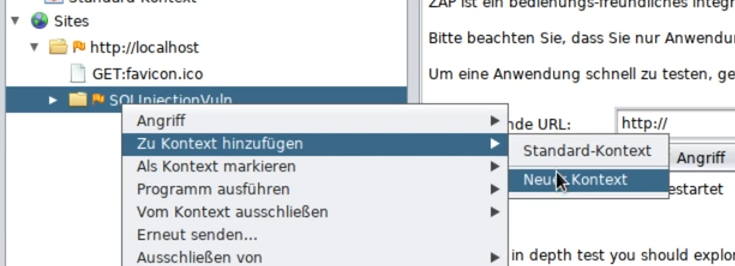
Then add the POST request to the previously created context: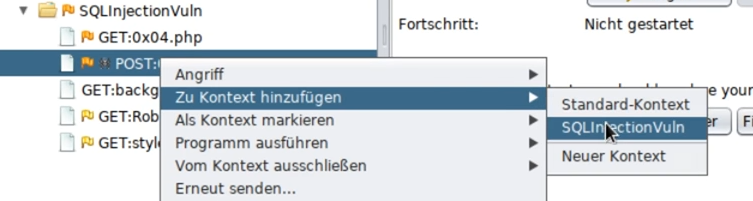
HTTP/NTLM Authentication means that the browser (not the website) asks for the login data.
Form-based authentication means that one logs in via an input form on the website.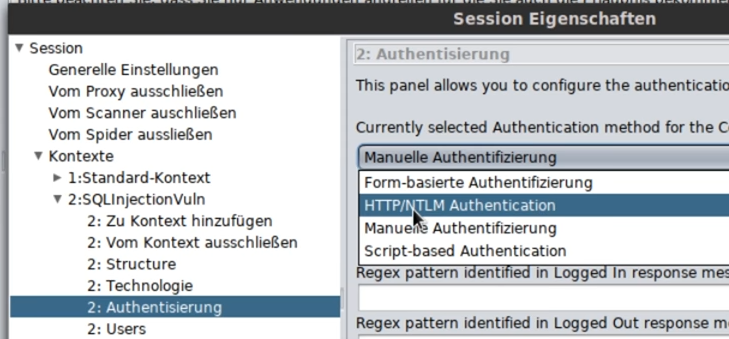
Form based: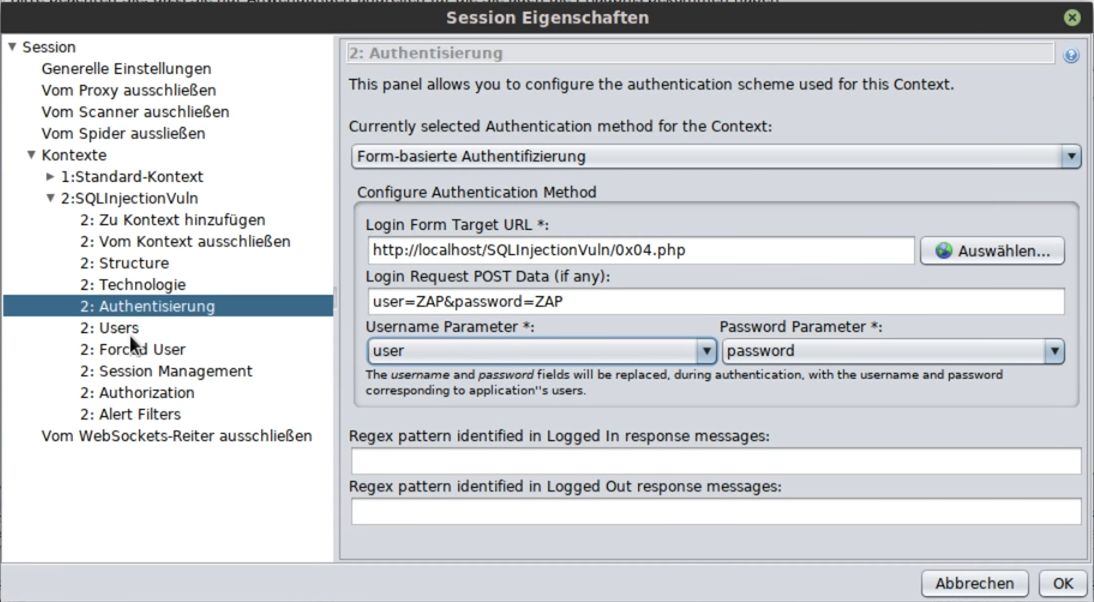
After that you can create new users: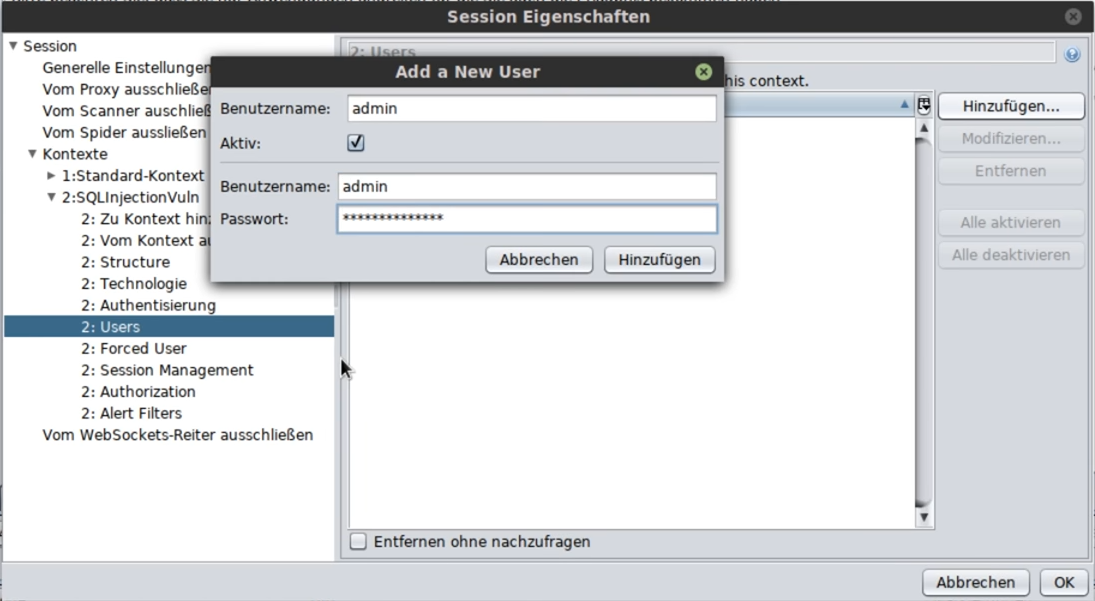
Now it is still important how the session is managed (for forms it’s usually cookie):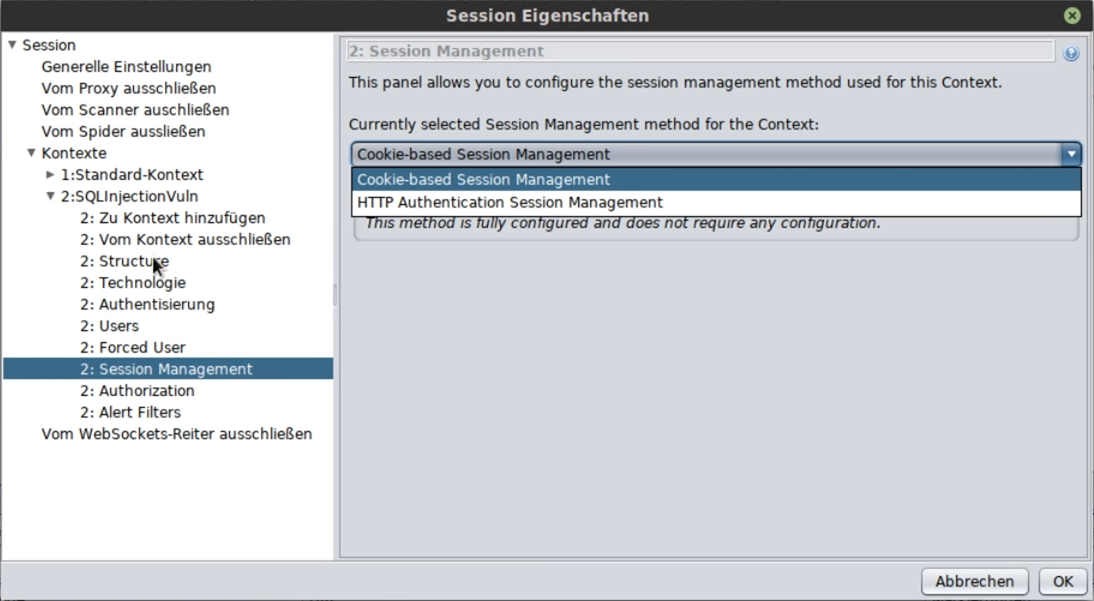
In the Authorization item, you must enter what will happen if you are not allowed to log in: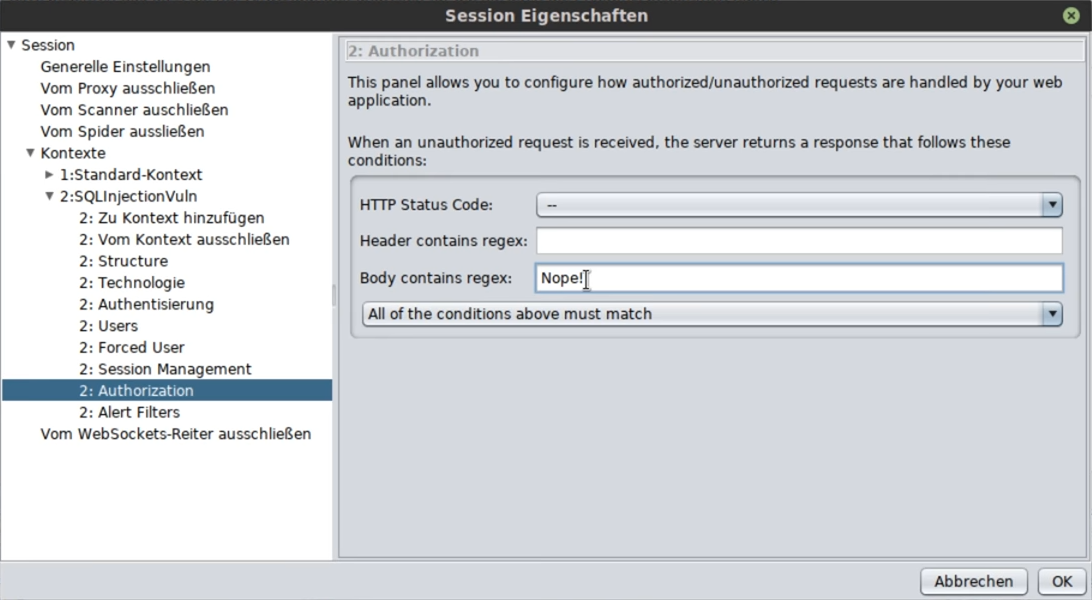
Usually somewhere in the body it says something like: failed, failed etc.
After that, you will see a small door icon that signals that you can log in: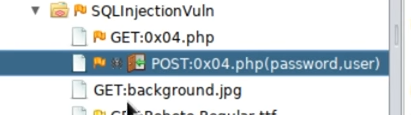
To run the scan now with the user logged in, you have to start a new scan under Spider and select the context instead of the site: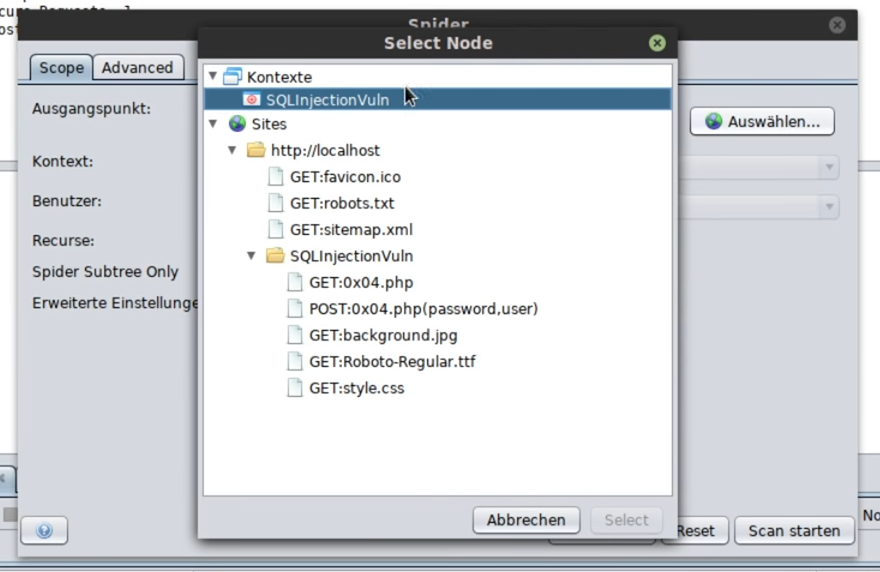
However, sometimes you may need to select the site folder and then specify the context: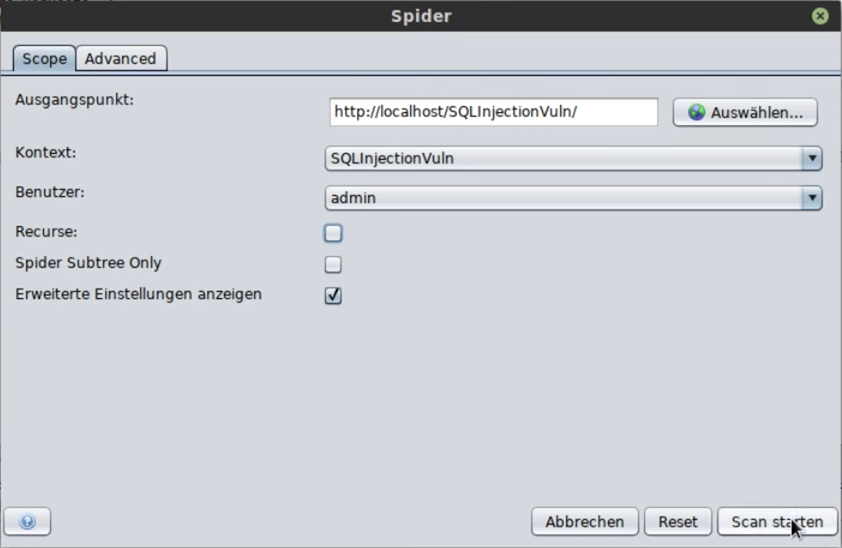
If you get a token when you log in, you can also set it and continue working with it: